Configure the Virtual meetings extension
Overview
Virtual meeting configuration consists of two steps:
- Authorize the meeting provider.
- Set up meeting automation.
Detailed instructions for each of the steps follow in the sections below.
Prerequisites
- The Virtual Meetings extension is installed.
- The Meetings Configuration page is published in your Skedulo web app.
- The Meetings Configuration page is available on your navigation bar.
Contact your Skedulo Customer Success Manager for more information.
Authorize a meeting provider
To authorize a meeting provider in your team, do the following steps:
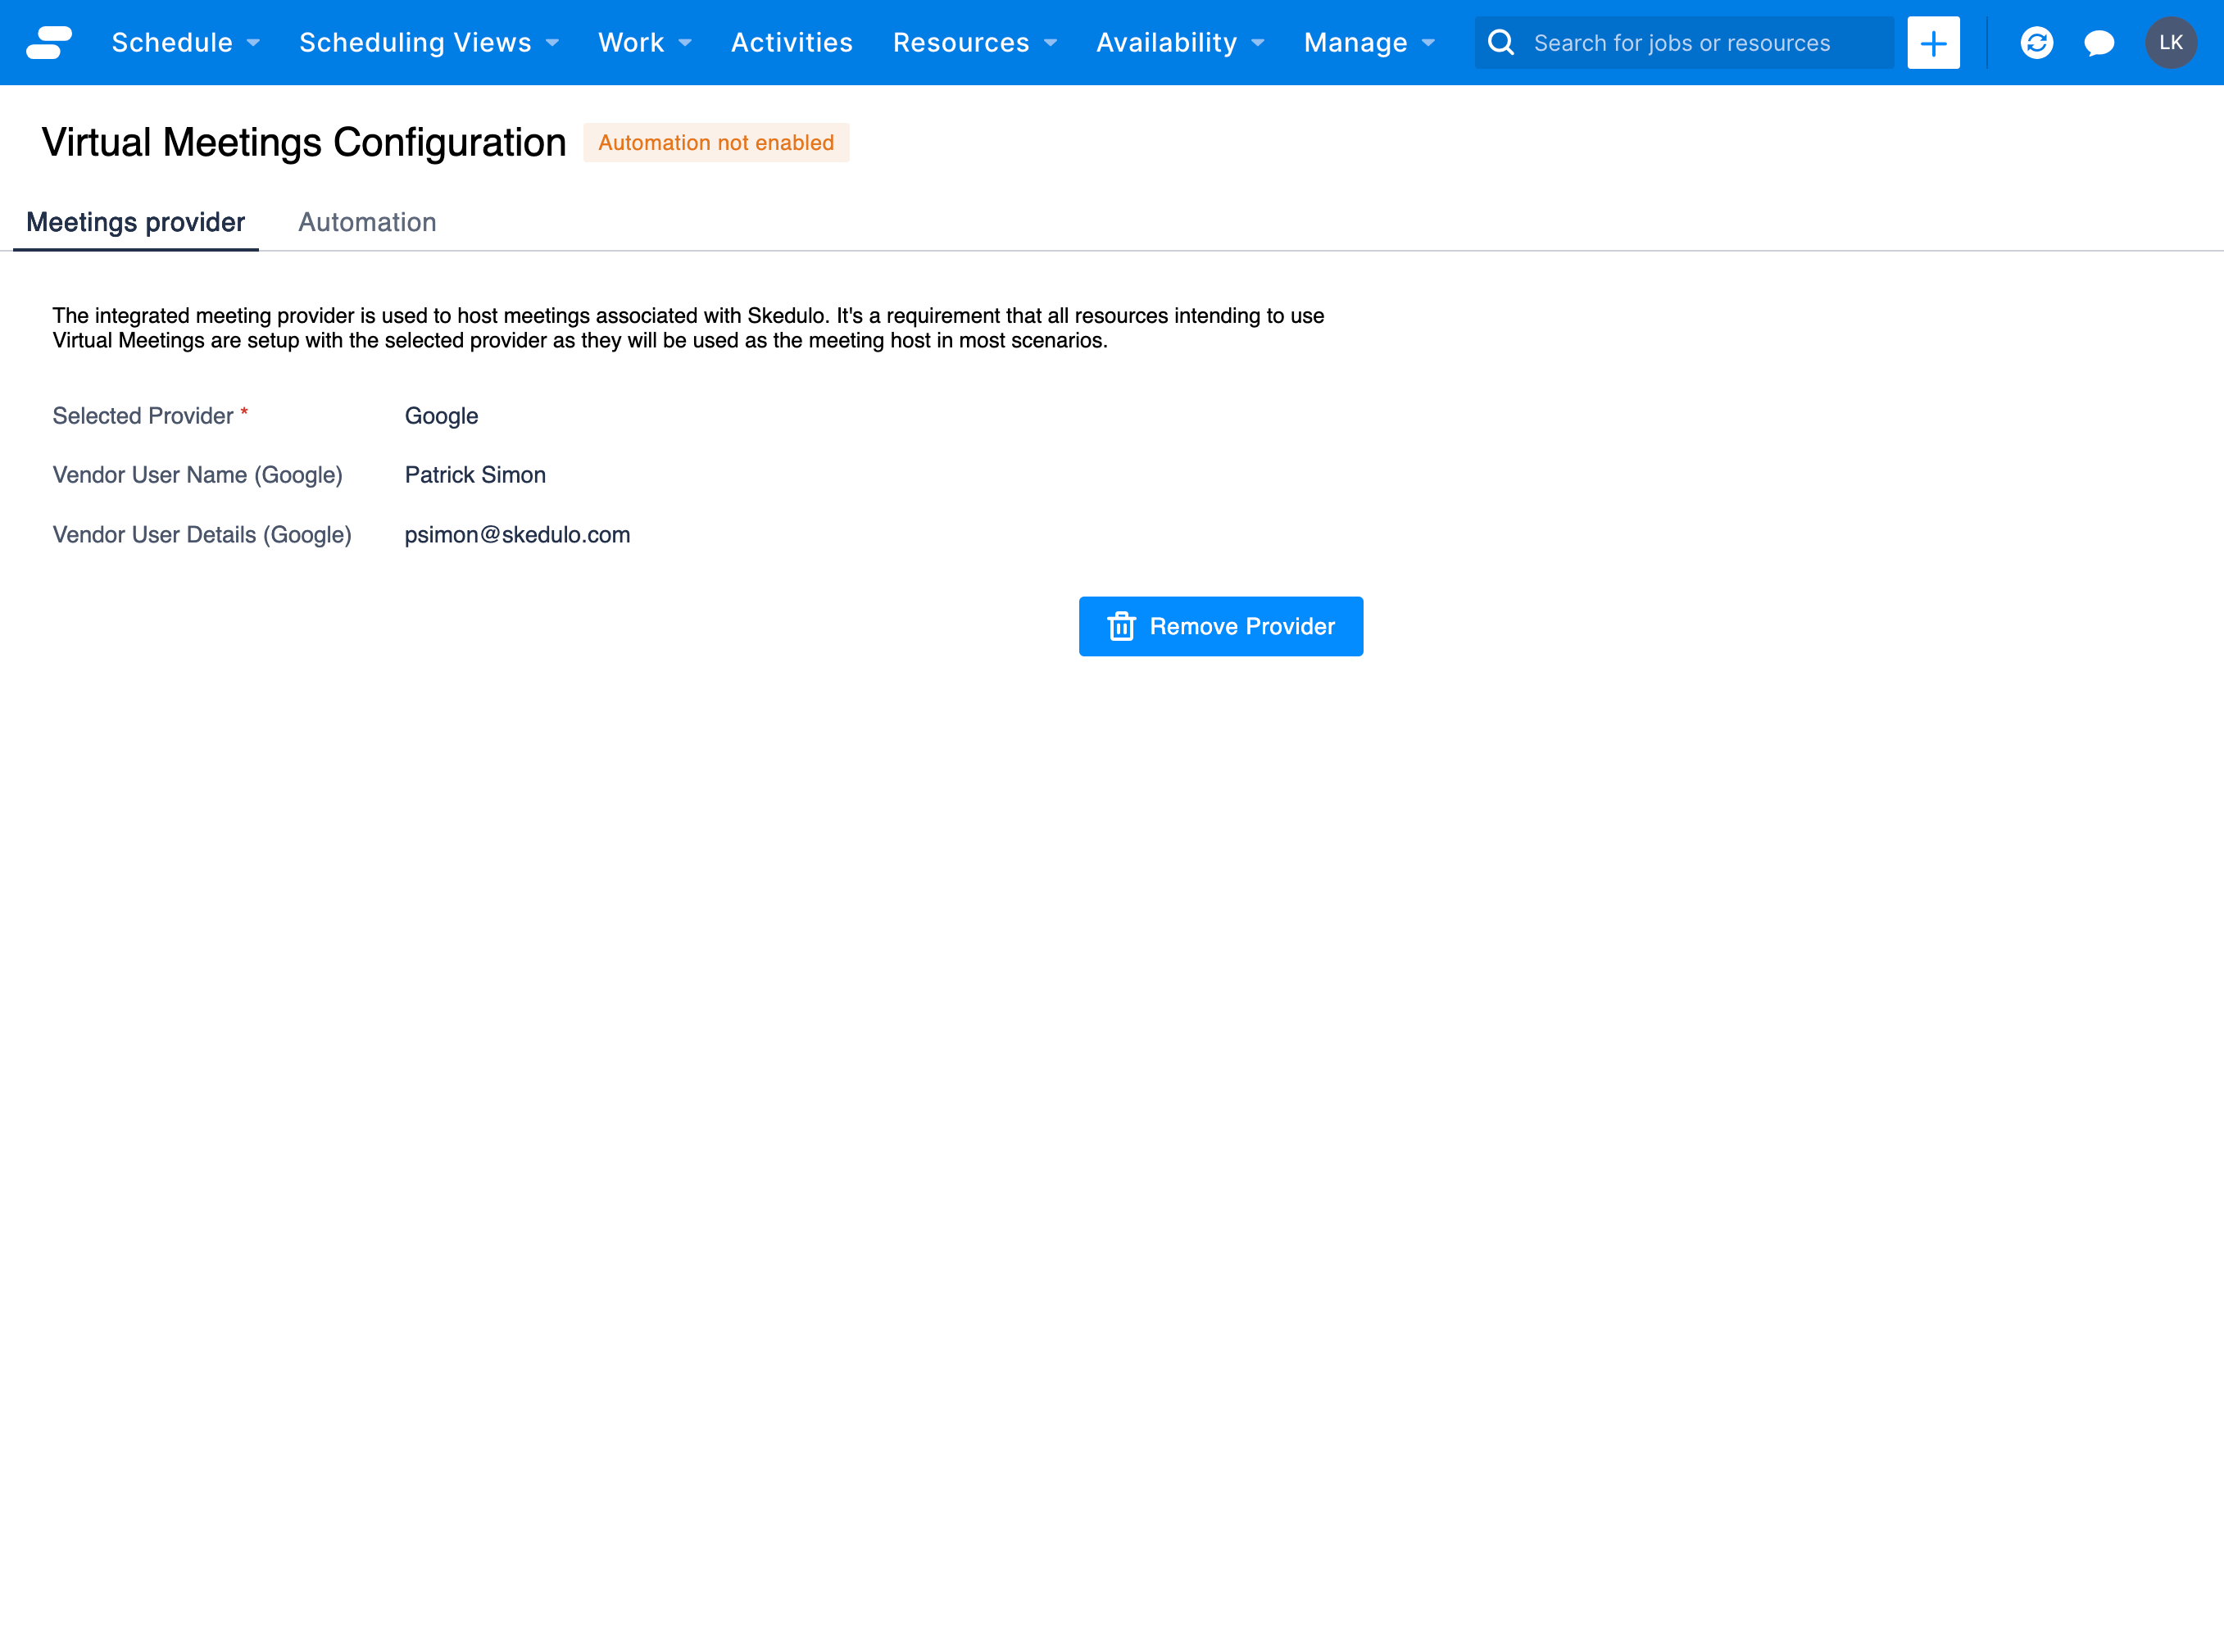
- On the Virtual Meetings Configuration page, navigate to the Meetings provider tab.
- Click the Select provider drop-down and then select your preferred provider.
- Click Authorize Provider. This opens your provider’s page to log in and authorize Skedulo within your provider account.
Request Permissions
You may need to upgrade your user permissions within your provider account to perform this authorization. - After the provider has authenticated to your Skedulo environment, they appear in the Meetings provider tab of the Virtual Meetings Configuration page, along with the vendor user details for the user who initiated the authorization. You will receive an email from your provider to confirm that the Skedulo app has been installed/authorized.
Remove the virtual meeting provider
You can remove the authorized virtual meeting provider from your Skedulo organization at any time.
Removing the provider will prevent virtual meetings from being created.
Any jobs that have already been scheduled with the current virtual meeting provider are unaffected and can proceed using the provided meeting URL unless your organization chooses to cease their account with the provider directly.
- In the Skedulo web application, go to Meetings Configuration to open the Virtual Meetings Configuration page.
- Confirm that you want to remove the virtual meeting provider currently authorized in the Meetings Provider tab.
- Click the Remove Provider button.
The Virtual Meetings Configuration page shows a warning if there is no integration for virtual meetings.
Configure automation for virtual meetings
After you have virtual meetings enabled and configured with a virtual meeting provider, you can have virtual meetings created for all jobs automatically using the Automation feature.
When automated, virtual meetings are automatically created through your provider and then added to a job when the job status transitions to Ready (or when the job creation filter criteria have been met); that is, the job has been scheduled and allocated resources are confirmed.
Important
Currently, automation is the only way to set up virtual meetings through the Skedulo web application.
If you want to create virtual meetings on a case by case basis, you will need to do this using the Skedulo API.
See the Skedulo API Reference Guide for information about using the Virtual Meeting API.
Prerequisite
- Have a virtual meeting provider enabled and configured in your Skedulo organization. See the Authorizing the Meeting Provider section above for more information.
- Obtain a long-lived API token in the Skedulo web app under Settings > Developer Tools > API Tokens. For more information about API tokens, see Configure Skedulo API Token.
To automate the addition of virtual meeting details to jobs, do the following steps:
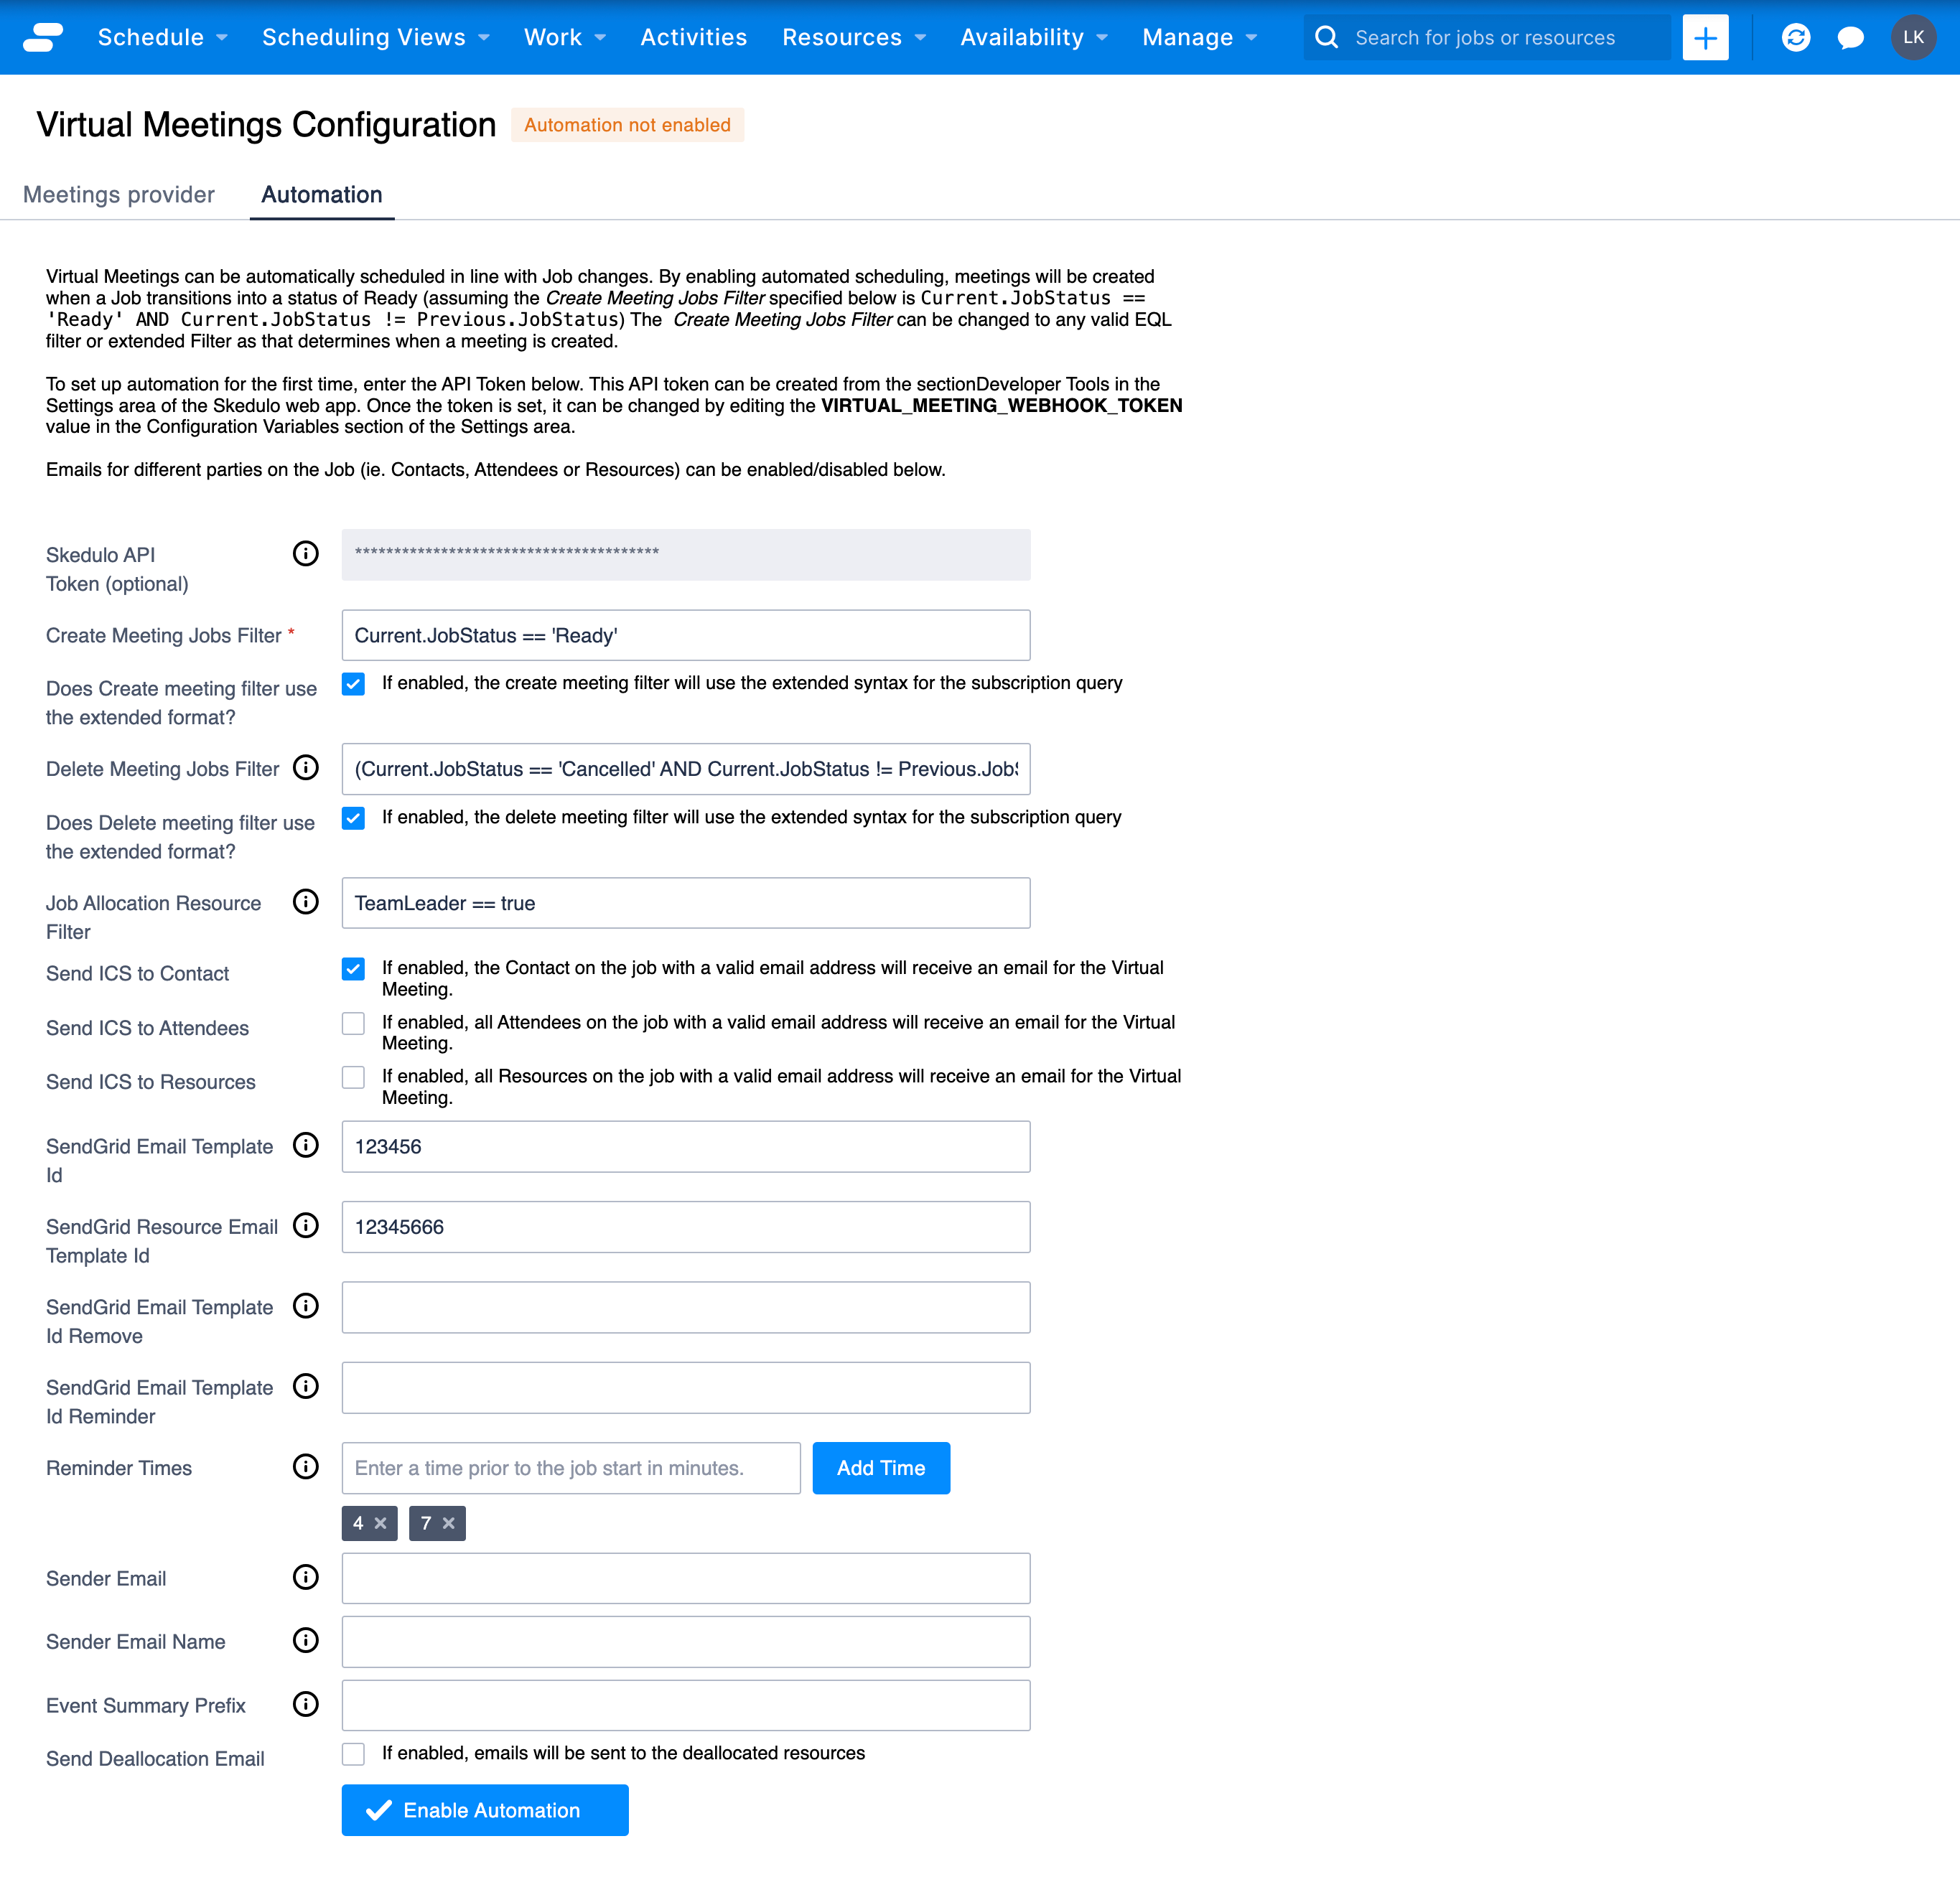
- In the Virtual Meetings Configuration page, navigate to the Automation tab.
- In the Skedulo API Token field, enter your long-lived access token.
- Configure meeting filters: a. Enter an EQL filter in Create Meeting Jobs Filter to specify when the virtual meeting is added to a new work item. Optionally select Does Create meeting jobs filter use the extended format?, if applicable. b. (Optional) Enter a filter in Delete Meeting jobs filter if the virtual meeting must be deleted when the job item is deleted. Optionally select Does Delete meeting jobs filter use the extended format?, if applicable. If no filter is added, then the meeting will not be deleted. c. (Optional for Zoom) Enter a filter in Job Allocation Meeting Filter to determine the allocation to consider as the meeting owner, e.g., the team leader.
- (Optional for Zoom) Provide a password for your meetings. Your meetings will be automatically created with this password, which will be required for guests to log in to the meeting.
- (Optional) Configure iCalendar email notifications: a. Select Send ICS to Contact if the meeting details should be emailed to work item contacts who have valid email addresses configured. b. Select Send ICS to Attendees if the meeting details should be emailed to work item attendees who have valid email addresses configured. c. Select Send ICS to Resources if they meeting details should be emailed to work item resources who have valid email addresses configured.
- (Optional) Configure SendGrid Email templates, if used.
a. (Optional) Add the SendGrid Email Template Id for the template to use when work items with virtual meetings are created. b. (Optional) Add the SendGrid Email Template Id Remove for the template to use when work items with virtual meetings are canceled. c. (Optional) Add the SendGrid Email Template Id Reminder for the template to use for work item reminders.
Important
Contact your Customer Success Manager to add SendGrid email templates for your Virtual meetings extension. - (Optional) Enter a numerical value in Reminder Times for the number of minutes before the meeting that reminders should be sent.
- (Optional) Enter a Sender Email from which emails regarding the virtual meeting will be sent.
- (Optional) Enter a Sender Email Name. Note that this needs to be configured in SendGrid to work correctly.
- (Optional) Enter an Event Summary Prefix as a text string to be added to the start of ICS notifications.
- (Optional) Select Send Deallocation Email if you want resources to receive an email when deallocated from a work item that has a virtual meeting.
- Click Enable Automation.
Disable virtual meeting automation
You can click Disable Automation to disable virtual meeting automation at any time.
To re-enable virtual meeting automation, you will need to provide your preferred configuration settings again, along with your Skedulo long-lived API token.
Feedback
Was this page helpful?