Allocate work
Overview
A scheduler can allocate resources to a work item using the swimlanes or through the work item’s details page.
Prerequisites
You must be a scheduler or a user with the required Scheduling permissions, especially Manage resource allocations.
Allocate resources in the swimlane view
To allocate resources in the swimlane view, do as follows:
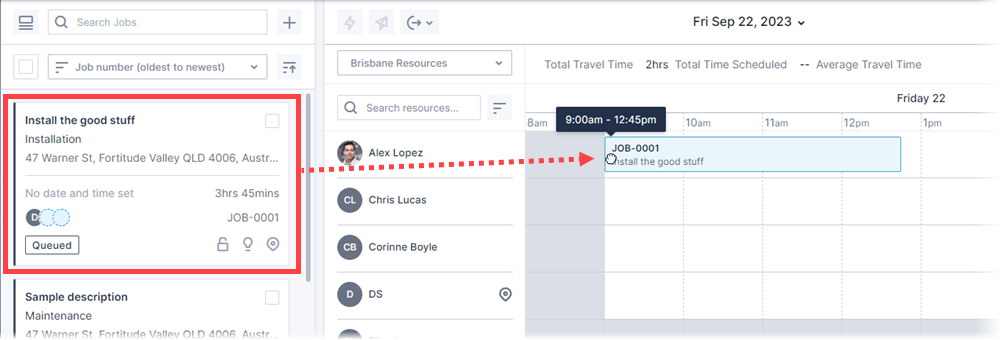
- Drag a work item straight from the work card list into the swimlane for a resource, and then drop it into place at the desired time.
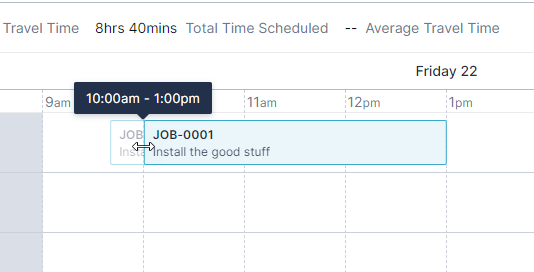
- You can adjust the work item’s duration by dragging either side of the card.
Related links
Allocate resources using the Work details page
The work details page offers greater control when assigning work. Allocate resources to work in the Resources section of the Details tab or in the Schedule tab.
Note
If you are using the Pulse Allocation Experience (Beta), please see the Pulse Allocation Experience documentation. Note that this feature is only available on the Skedulo Pulse Platform.Allocate from the Details tab
You can allocate resources to a work item using the Resources section on the Details tab of the Work details page.
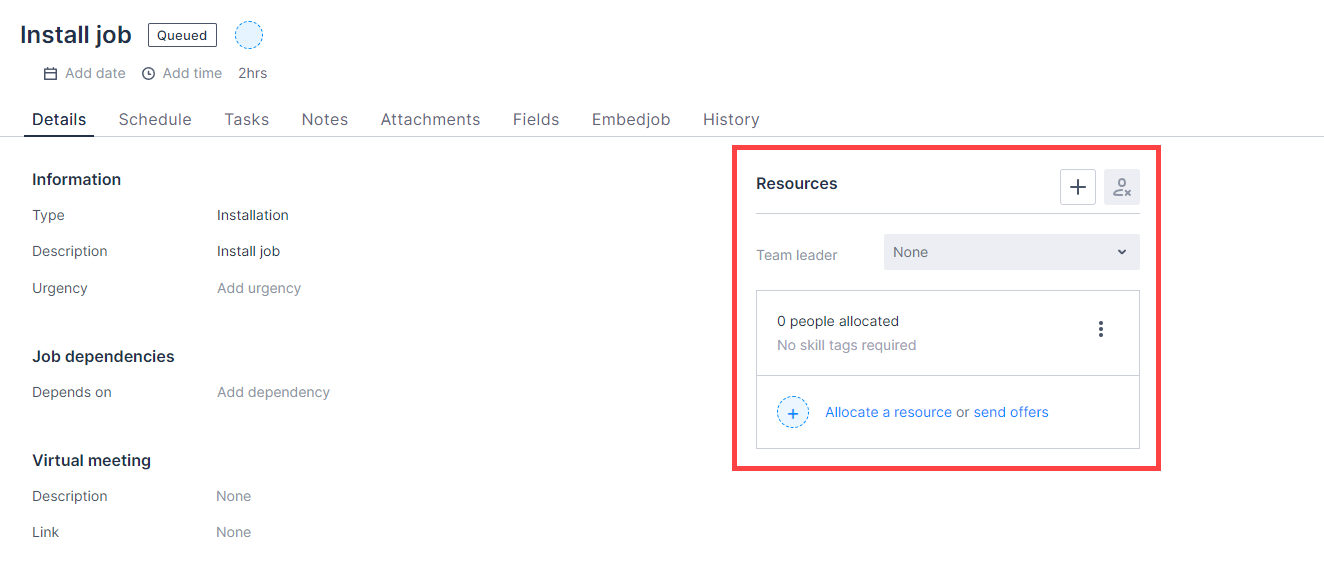
Click  Add resources or
  Allocate a resource to open the Select Resource(s) modal. This modal provides a searchable and sortable list of all resources, which are potentially available for allocation (based on known information). Select one or more individuals from the list of available resources and click Save.
Allocate from the Schedule tab
There are two ways to allocate resources from the Schedule tab of the work details page:
-
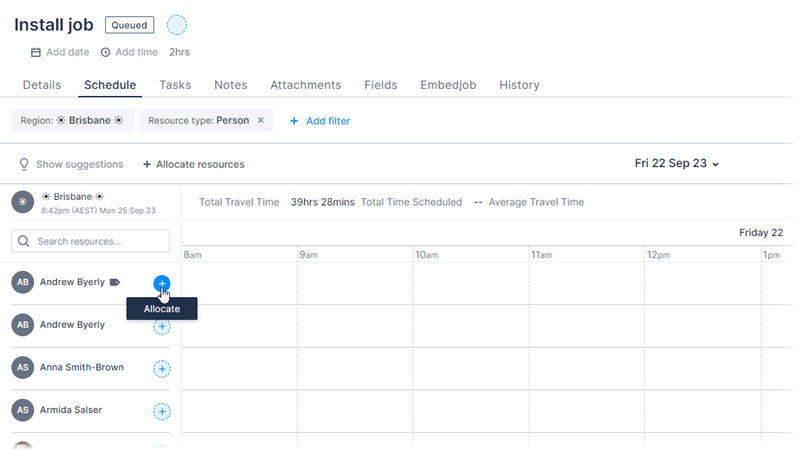
Click on the blue Allocate button, to the right of a resource’s name. The Allocate button is replaced with a green checkmark to indicate the resource has been allocated to the work item.
-
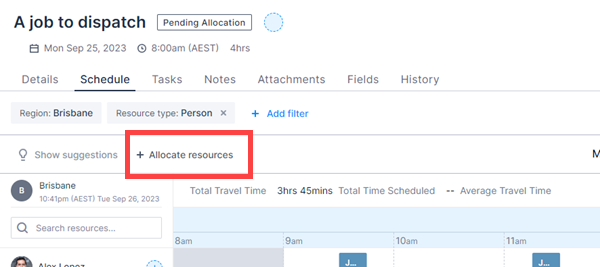
Click Allocate resources to open the Select Resource(s) modal, which provides a searchable and sortable list of all resources that are potentially available for allocation (based on known information). Select one or more individuals from the list of available resources and click Save.
Add more resources
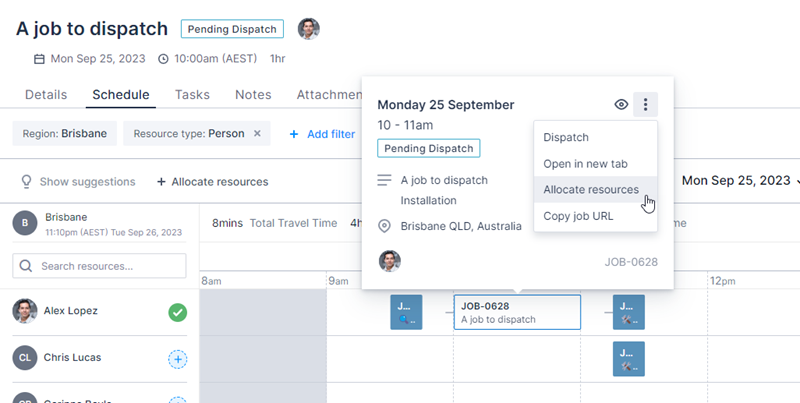
If you already have one or more resources allocated to a work item, you can add further resources by clicking the work item’s card in the swimlane.
- On the card, click the Actions button
 and then select Allocate resources to open the Select Resource(s) modal. Select one or more individuals from the list of available resources and click Save.
The Select Resource(s) modal
By default, only resources that match the job criteria (tags) are shown. In order to show all resources in the job region, select a different region and then select the original region.
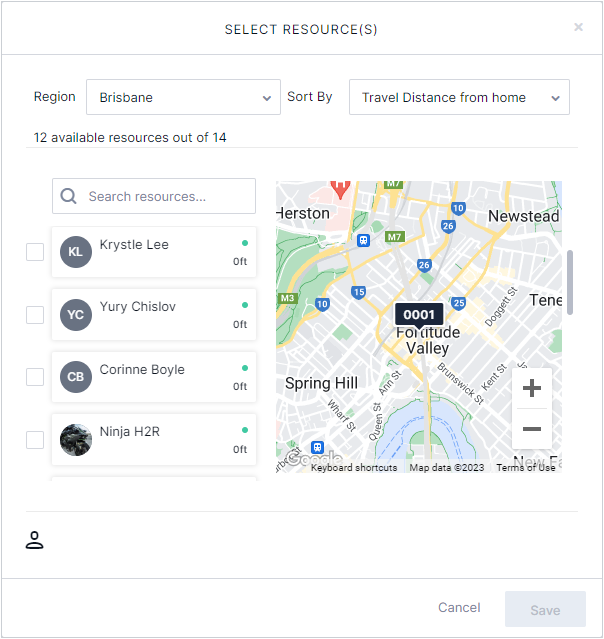
Use the Search field to quickly search for and select a resource.
The resultant resource list is sorted by Travel Distance from home in meters. However, the scheduler can toggle between a number of sort options:
- Travel Distance from home. Sort the resource list by travel distance as determined by the underlying web mapping service.
- Travel Duration from home. Sort the resource list by travel distance as determined by the underlying web mapping service.
- Best Fit. Sort the resource list based on Skedulo’s default scoring algorithm to determine the most appropriate fit It picks the resource who is closest to the job (based on the previous job that the resource was working on for a given time). It also considers skill tags (hard and soft), time constraints, inclusion/exclusion lists, etc.
- Name. Sort the resource list by name.
- Highest Rating. Sort the resource list by “Rating” (as specified in the resource’s details on Salesforce CRM).
- Least Utilised. Sort the resource list based on resources with the least utilization (requires a job in a Pending Allocation status or later as it requires a date to perform its calculations).
If an available resource is displayed with a blue-gray background, they have been ruled out by the Skedulo suggest engine as not meeting the requirements of the work. They can still be selected by the scheduler.
The following conditions can affect resource recommendations when allocating a job:
- Scheduled activities (for example, meal breaks).
- Insufficient travel time (to arrive at the job or return home).
- Unallocated shifts (for organizations that enable shifts)
Tip
To display metric distance units for travel, set the distance options in the Settings > Preferences page.
For more information, refer to View and configure preferences or Scheduling user preferences.
Remove an allocated resource and reallocate the work
There are several ways to remove an allocated resource from a work item.
On the Details tab of the work details page:
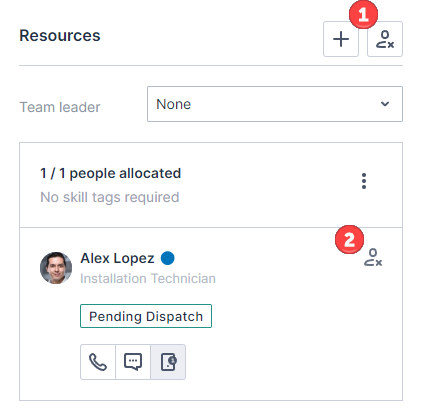
- Click Remove Resources at the top of the Resources section (
 ) to remove all resources from a work item.
 - Click Remove Resource beside an individual resource (
 ) in the Resources section to deallocate just that resource from the work.
On the Schedule tab of the work details page, hover over the green checkmark button and click when Deallocate is displayed.
Once an allocated resource has been removed from a work item, the resource is notified with a pop-up message in their Skedulo mobile app. A detailed notification announces the allocation has been canceled. The work card is removed from their agenda once it has been refreshed.
Note
A work item with a status of Confirmed can still be reallocated by the scheduler. Once the work item is completed (locked), it can no longer be reallocated.Resource is no longer active in Salesforce
When a resource is made inactive in the CRM (when Is Active is unchecked in the resource’s profile), all future job allocations that have been assigned to that resource are marked Deleted except for jobs that have the status Complete or Cancelled.
Related links
Feedback
Was this page helpful?